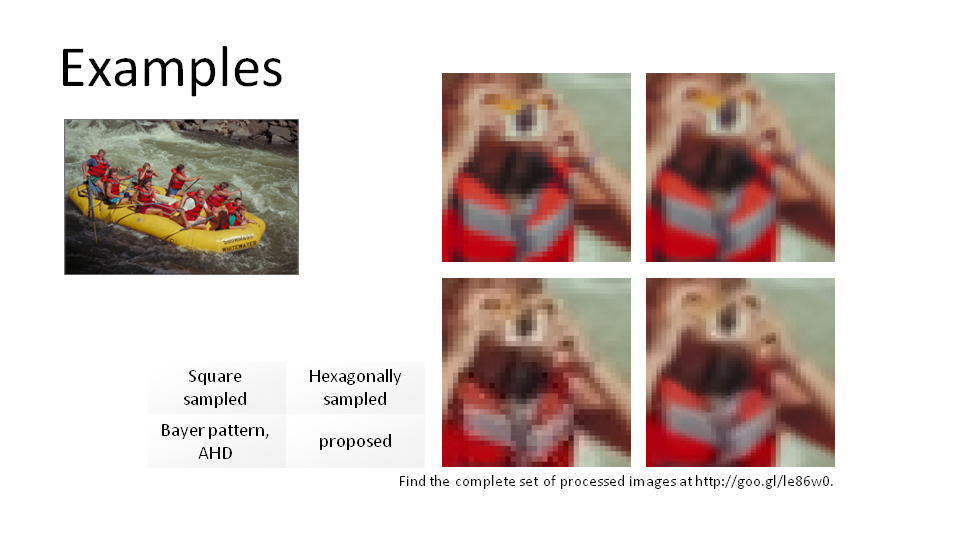
I have already mentioned my paper in earlier posts. Today I want to share the slides that I used when I presented the paper in China at ICGIP 2014.
Showing posts with label demosaicking. Show all posts
2016-05-01
2016-01-05
Demosaicking Algorithm for the X-Trans Color Filter Array
In my last post I showed that ACDSee´s demosaicking algorithm for X-Trans images has a few issues. Well, interpolating the X-Trans color filter array (CFA) is not as easy as interpolating a Bayer CFA, simply because the X-Trans CFA is much more complex. However, Fuji (inventor of the X-Trans CFA) claims that their layout can outperform the Bayer CFA in terms of image quality. Obviously this is only true when applying a demosaicking algorithm which is sophisticated enough to really handle the CFA.
Some time ago in 2013 I wrote my own demosaicking algorithm for the X-Trans CFA as part of my master thesis. Actually the goal of the thesis was to compare various CFAs which is not so easy because the quality of the resulting image does not only depend on the used CFA but also on the used demosaicking algorithm. But I don´t want to bother you with this here. Instead, I want to share my algorithm. I have written it in Matlab. Below you will find the links to the source files.
XTrans_to_RGB.m
RGB_to_XTrans.m
Test.m
I have to say I´m sorry for the missing comments in the source files. Let me briefly explain how it works. Best is to start with the test.m file. You can use it to load an RGB image and convert it into an X-Trans image (RGB_to_XTrans) or to load a tiff which contains the raw sensor data. The program is not ably to directly read *.RAF files. I used DCRaw with the options '-E -T -4' to convert the *.RAF into a 16bit TIFF.
After loading the image file, it will be converted into a full RGB image. No color correction will be applied to the image, this is why RAW files will appear dark after they have been processed. If you use RGB images for testing, however, then the result should be fine.
Below you'll find some processed test images (top) and the original image (bottom) to compare.


Well, decide for your own, but I think the quality is pretty good and for sure better than what ACDSee can achieve. But it´s not perfect. Let me discuss a few issues:
Let me add a few words on how the algorithm works. I basically use the main principles of Hirakawa´s 'Adaptive Homogeneity-Directed Demosaicing Algorithm'. First, I interpolate the green channel in for directions (horizontally, vertically, and 2x diagonally). After that I interpolate the red and blue channels in the same way. For this I exploit the interchannel correlation. The result are four candidate images. In the next step I rate at every pixel location from which candidate image to take the RGB values to construct the final image. After that I add some alias canceling to suppress color seams. That´s it.
Feel free to play around with my algorithm. I will be happy about every feedback. Please don´t use it commercially!
Some time ago in 2013 I wrote my own demosaicking algorithm for the X-Trans CFA as part of my master thesis. Actually the goal of the thesis was to compare various CFAs which is not so easy because the quality of the resulting image does not only depend on the used CFA but also on the used demosaicking algorithm. But I don´t want to bother you with this here. Instead, I want to share my algorithm. I have written it in Matlab. Below you will find the links to the source files.
XTrans_to_RGB.m
RGB_to_XTrans.m
Test.m
I have to say I´m sorry for the missing comments in the source files. Let me briefly explain how it works. Best is to start with the test.m file. You can use it to load an RGB image and convert it into an X-Trans image (RGB_to_XTrans) or to load a tiff which contains the raw sensor data. The program is not ably to directly read *.RAF files. I used DCRaw with the options '-E -T -4' to convert the *.RAF into a 16bit TIFF.
After loading the image file, it will be converted into a full RGB image. No color correction will be applied to the image, this is why RAW files will appear dark after they have been processed. If you use RGB images for testing, however, then the result should be fine.
Below you'll find some processed test images (top) and the original image (bottom) to compare.


Well, decide for your own, but I think the quality is pretty good and for sure better than what ACDSee can achieve. But it´s not perfect. Let me discuss a few issues:
- The images have a strange pattern on their edges. This is not really a problem of the algorithm. It´s simply because my algorithm is just a prototype and I didn´t care about the edges. Maybe this is also what happens in ACDSee´s processing (but theirs is not a prototype). It could easily be fixed by adding a few pixel rows/columns before demosaicking and crop them afterwards.
- Loss of detail, e.g. in the grass in the first image. Well, of course. I can´t do magic.
- Strange colors on fine details, e.g. on the trousers of the driver in the foreground in the last image or in the water in front of the boat in the second image. The X-Trans CFA has a rather low color resolution. Without pre-filtering the image we should expect to see things like these. Maybe it is possible to fix it by tweaking the algorithm (e.g. increase the number of runs for the alias canceling), however, there´s always a tradeoff. Fixing this issue will most probably result in bleeding colors (like in the 'numbers' image in my last post).
Let me add a few words on how the algorithm works. I basically use the main principles of Hirakawa´s 'Adaptive Homogeneity-Directed Demosaicing Algorithm'. First, I interpolate the green channel in for directions (horizontally, vertically, and 2x diagonally). After that I interpolate the red and blue channels in the same way. For this I exploit the interchannel correlation. The result are four candidate images. In the next step I rate at every pixel location from which candidate image to take the RGB values to construct the final image. After that I add some alias canceling to suppress color seams. That´s it.
Feel free to play around with my algorithm. I will be happy about every feedback. Please don´t use it commercially!
2015-10-21
X-Trans RAW files in ACDSee Pro 9
Recently ACDSee Pro was released in version 9. One of the new features is the support for Fuji cameras with an X-Trans sensor layout. Knowing that even Adobe did a pretty poor job with their first demosaicking algorithm for this kind of color filter array, and knowing that ACDSee still does a poor job with their demosaicking algorithm for Bayer color filter arrays I was curious about the performance of this new feature. So I downloaded some sample RAW files taken with a Fuji X-Pro1 and converted them using ACDSee Pro 9, Lightroom 5 and DCRaw to compare the results.
One of the first things that I figured out was that the comparison of the demosaicking performance would not be as easy as I thought. While ACDSee and Lightroom produce image files with 4896 x 3264 pixels, DCRaw created files with 4952 x 3288. It seems that both ACDSee and Lightroom crop the image, maybe to allow some distortion correction while still maintaining the same resolution (which is actually the same resolution as the camera itself delivers when shooting Jpeg). Only DCRaw seems to convert the whole captured image data. In my opinion it is a pity that both commercial products do not provide access to the whole captured data.
The next crop shows a scene from which you might think that it should be pretty easy to handle. It shows a part of the rails of a tram - these are typically straight and not fringed.
A similar scene than the one before. The rear of a car with the rear window on top and some silver metal at the bottom. The differences to the scene before are that here we have
One of the first things that I figured out was that the comparison of the demosaicking performance would not be as easy as I thought. While ACDSee and Lightroom produce image files with 4896 x 3264 pixels, DCRaw created files with 4952 x 3288. It seems that both ACDSee and Lightroom crop the image, maybe to allow some distortion correction while still maintaining the same resolution (which is actually the same resolution as the camera itself delivers when shooting Jpeg). Only DCRaw seems to convert the whole captured image data. In my opinion it is a pity that both commercial products do not provide access to the whole captured data.
The above image is a 100% crop of the three converted images stacked and aligned in three layers in Photoshop. In order to enhance the images´ borders I added colored frames to them. The blue frame indicates the image from ACDSee, the green one is Lightroom and the red one is DCRaw. ACDSee´s and Lightroom´s images have the same size but they use a different crop of the original, that´s why the blue and green frame don´t match.
Another problem with comparing the images is that obviously Lightroom applies some sort of distortion correction to some images, even though lens corrections are disabled.
But anyway, let´s have a closer look to some critical details in the converted images and see if we can find some artifacts.
Test scene 1:
The image below shows a 200% crop of a detail of an image shot with the X-Pro1. The RAW file was converted with Lightroom 5, ACDSee Pro 9 and DCRaw (top to bottom). Because of the scaling factor it is pretty easy to identify artifacts. Beside that it is also easy to recognize that DCRaw has a different way of handling the colors (but this is nothing that I care about).
- In the DCRaw (bottom) you can clearly see awkward colored pixels around the numbers, something that is called zippering. This was pretty common in simple demosaicking algorithms in former times. Modern algorithms for the Bayer array typically don´t produce much visible zippering artifacts. Due to the fact that X-Trans is much more complicated for demosaicking, zippering seems to be an issue again.
- In the Lightroom conversion (top) there is no zippering at all. However, you can see that around the numbers the background is not as saturated as it should be. Lightroom applies a filter to reduce color artifacts but the price for that is washed out colors. Well, I have to admit that this is something that is barely visible at 200% and not at all visible at any zoom level lower than 100%.
- The ADCSee conversion (middle) has a similar problem as the one from Lightroom, only here it is much stronger. There is a yellow border around the white numbers. Obviously they have applied a little bit too much false color reduction.
The next crop shows a scene from which you might think that it should be pretty easy to handle. It shows a part of the rails of a tram - these are typically straight and not fringed.
- Lightroom (top) has no problems with this situation. The rails are perfectly smooth.
- ACDSee (middle) fails. There are strong artifacts along the rail.
- DCRaw (bottom) seems to do better than ACDSee. However, the image shows less contrast. Chances are good that artifacts would be more visible after some color correction and contrast enhancement.
A similar scene than the one before. The rear of a car with the rear window on top and some silver metal at the bottom. The differences to the scene before are that here we have
- two solid areas (before it was just a bright line on dark background)
- these areas are separated almost horizontally (the line before was skewed)
- and the areas have high contrast
These are three factors which should make demosaicking easier.
- Lightroom (top) perfectly separates the two areas. Nothing to claim here.
- ACDSee (middle) fails again. Strong zippering is visible.
- DCRaw (bottom) also shows strong zippering.
Test scene 4:
This time I only show a crop of an ACDSee image. It is taken from the very left side of the processed Raw file. As you can see there are extremely strong artifacts on the left side. Actually the border of the whole image looks like this (also check the image on top). There is a border around the image which is totally unusable. So, in fact you would have to crop the outer 16 pixels from all your converted images (I have tested this with some more images, it is the same with all of them)
In this case I wouldn´t even call it a bad algorithm but rather a bug which they should fix as soon as possible.
Conclusion:
I could continue with hundreds of examples, all showing the same thing: ACDSee´s Raw converter is not competitive. One could say that what I do is pixel peeping and not really relevant for photographers. Actually I agree that it is pixel peeping. Designing image processing algorithms is one of my hobbies and I believe it should be the ultimate ambition of companies like Adobe and ACD Systems to create the best performing algorithms. ACD should not be satisfied with being able to process X-Trans files, they should rather do their best to get the best out of these files. Well, it seems that they have different priorities. Regarding the relevance for photographers I have to say that I believe that image quality (even on a pixel level) is important for them. Why would I decide to by a 24 megapixel camera if I don´t care about the pixels and why would I decide to shoot in Raw if I then use a tool which does not get the best out of these files? If I didn´t care, I could use my smart phone...
2015-06-19
Which Raw converter does the best demosaicking?
Below are some details of images which I captured in Raw format and converted with different programs (ACDSee Pro 6, Canon Digital Photo Professional, Lightroom 5, Raw Therapee V4.0 with "amaze" algorithm). The goal was to identify differences in their demosaicking algorithms and quality.
In order to get comparable results I set sharpening to 0 or turned it off in all programs. I also turned off chromatic aberration correction to really reduce the image processing to a minimum.
The images were shot at an oldtimer show in Salzburg, Austria on a Canon 60D (no the newest model, but sufficient for this kind of test) with an EF-S 24mm F2.8 lens.
In all scenes you will find the ACDSee image in the upper left corner, the Canon DPP image in the upper right corner, the Lightroom image in the lower left corner and the Raw Therapee image in the lower right corner.
In order to get comparable results I set sharpening to 0 or turned it off in all programs. I also turned off chromatic aberration correction to really reduce the image processing to a minimum.
The images were shot at an oldtimer show in Salzburg, Austria on a Canon 60D (no the newest model, but sufficient for this kind of test) with an EF-S 24mm F2.8 lens.
In all scenes you will find the ACDSee image in the upper left corner, the Canon DPP image in the upper right corner, the Lightroom image in the lower left corner and the Raw Therapee image in the lower right corner.
In this scene you can see how skewed lines are processed. The headlight of the car (a Jaguar) is in perfect focus. You can clearly see that ACDSee tends to create blocks of 2x2 pixels at lines at an angle of roughly 45° (staircasing). If you zoom in a bit you can even see some pixels which are obviously too dark (overshooting) at the upper left side of the headlight mount.
Raw Therapee shows some color artifacts all over the headlight. This crop is close to the center of the image, but still this could be due to chromatic aberration. Even though sharpening is turned off, the image looks unnaturally crisp.
DPP seems a little blurry but free of artifacts.
Lightroom has a good balance of sharpness and artifacts. If you look close enough you will find some color artifacts, but less than in the Raw Therapee image and also some blocky skewed lines, but not as bad as in the ACDSee image.
This scene shows a similar situation, only this time there is more contrast, which makes the artifacts visible even more. The crop is taken from the upper left third of the image, so chromatic aberration is noticeably stronger than in the crop before.
ACDSee can´t handle this situation at all. This image looks awful.
DPP smoothens out the CAs and creates a nice smooth image.
Again, Raw Therapee struggles with colors and Lightroom is somewhere in between. While artifacts (color and blocking) are visible, the image is sharper than canon´s.
This is a part of the image which is slightly out of focus. Sharpness is is not a big topic in this scene. Normally you would think that this makes demosaicking easier, but obviously this is incorrect.
Again, ACDSee fails in reproducing skewed lines. The creases in the man´s shirt show heavy staircasing and look awful.
Raw Therapee can handle this situation better, even better than Lightroom which also shows some light staircasing.
Canon DPP is the clear winner in this scene. The image is very smooth.
Similar situation than in the second image. Again, Canon and Adobe are the winners, ACDSee and Raw Therapee struggle with the high contrast skewed edges.
Another situation where ACDSee clearly fails. Skewed lines and edges are obviously not its strength. Raw Therapee can handle this situation much better, however, it shows color fringes again. Lightroom has some staircasing and color fringing as well. DPP has less sharpness but no artifacts at all.
This is a very interesting image. Red detail on black background is a difficult thing to handle for demosaicking algorithms because there is no information that can be extracted from the green channel which could support the interpolation of the red channel.
ACDSee fails in this test even worse then ever before. There are bright pixels in the red lines which look like a pearl necklace. This is due to overshooting in the interpolation of the missing pixel values.
In Raw therapee the two parallel lines can be clearly separated, but they look somewhat "digital". If you zoom in you can see that the red lines seem to be stitched together from pieces of 45° lines.
When you zoom in you will also identify some overshooting and pearl necklaces in the Lightroom image but by far not as bad as in the ACDSee image.
The DPP image does not separate the two parallel lines as good as the others, but again, it looks less processed and more natural.
In general it seems that Canon does not put so much detail into the image, but therefor the images are completely free of demosaicking artifacts. This means that the images look very natural and not digital, even when you zoom in. The other three programs produce very crisp images, even with sharpening turned off. This makes the pixes sturcture visible and creates a "digital look". Also it allowes interpolation artifacts to be more pronounced.
After having analysed these (and some more) test images, my rating is the following.
1) Canon Digital Photo Professional
2) Adobe Lightroom 5
3) Raw Therapee V4.0
4) ACDSee Pro 6
I have to emphasize once more that this rating is just about the quality of the demosaicking. It does not take into account other features of the tools. Also, obviously, the selection of the tools is by far not complete. The reason why I tested exactly these four is just because I have them. I bought ACDSee some time ago. When I figured out that it´s image quality sucks, I bought Lightroom. And well, Raw Therapee is for free and DPP came with the camera anyway.
If you like, please post your opinion and your own experiences.
2015-05-03
"A Novel Color Filter Array and Demosaicking Algorithm for Hexagonal Grids" published
It took quite a while but now our paper "A Novel Color Filter Array and Demosaicking Algorithm for Hexagonal Grids" is online at SPIE. Follow the link to download it.
The main idea presented in this paper is to replace the square grid, which is typically used in digital imaging with a hexagonal grid. This alone is not a new idea, there have been people in the past who thought about using hexagonal pixels. However, we also propose a color filter array for such a grid. Remember, color filter arrays are used to make an image sensor capture color images, by letting every single pixel capture only one of three primary colors. And because this alone is not very helpful, we also provide a demosaicking algorithm for this CFA.
So here´s our CFA:
As you can see, its color distribution is very different to that of the Bayer pattern. 6 out of 9 pixels on our grid are green, which allows for very good luminance interpoaltion, without using cross-channel information. There are quite few red and blue pixels on our grid. This does actually not matter in most cases as we can use cross-channel information for the interpolation of these.
The main idea presented in this paper is to replace the square grid, which is typically used in digital imaging with a hexagonal grid. This alone is not a new idea, there have been people in the past who thought about using hexagonal pixels. However, we also propose a color filter array for such a grid. Remember, color filter arrays are used to make an image sensor capture color images, by letting every single pixel capture only one of three primary colors. And because this alone is not very helpful, we also provide a demosaicking algorithm for this CFA.
So here´s our CFA:
![]() |
| Hexagonal Color Filter Array |
2014-10-03
ICGIP 2014
In a few weeks the international conference on graphics and image processing (http://icgip.org/) takes place in Beijing. I will be there to present my paper "A novel color filter layout and demosaicking algorithm for hexagonal grids". I´m looking forward to a lot of interesting presentations and people...
Subscribe to:
Posts (Atom)